I started working on the interior detailing for the Planet model including designing decorative tiles. I want to have 2×2 tile “newspapers” like the ones that official LEGO sets have, but with small (and I do mean small!) Easter eggs for fans of Superman. The first ones I designed are the ones from Superman Returns with Brandon Routh in the lead role. After Superman pushes the kryptonite laden island that Lex created and is badly injured, there’s a scene where the camera is looking over Perry’s shoulder in his office and he’s designed and had pre-production prints of newspaper headlines that cover his bases whether Superman lives or dies. You can see my versions below.
I do have plenty of experience doing graphical work, but for the first time I drew the little Superman using Procreate on my iPad and I have to admit that once I got it all set up, it was actually quite fun to sit and draw on it – I do tend to be a pencil and paper kinda guy, and then I scan and send it to my computer for inking and coloring.
Now that I’m getting the hang of doing it on the iPad, I think I’ll try the to do the remaining dozen or so with it, and then have them custom printed onto LEGO tiles. And of course I’m not going to use stickers, because it seems that they’re as hated but the entire LEGO community as much as they’re hated by me.
When I started designing a modular Daily Planet, there were a few aspects and elements I knew I wanted, and one of those was to retain the art deco influence of many of the comics that featured the Planet, and that included creating a sign that was evocative of the era. I also knew that for some of the decorative element I was going to have to have tiles printed where default LEGO tiles were not available, especially given that LEGO has never produce a Daily Planet model. Fortunately for brick nerds like me there’s a tool similar to the tool I use to create the models calle Bricklink PartDesigner. If you’re a little design savvy you can create your own decorative bricks, tiles and even minifigures and export them for use in Stud.io.
Since I’ve been trying to use only readily available LEGO pieces until now I haven’t played with PartDesigner but over the past weekend I decided to create a custom set of tiles to make the front of the sign (which has been a placeholder up until now), and along the way I ran into a hiccup that may have bitten a few other people trying to do something similar.
When you design a model, if you use a piece in a color that isn’t available in the real world, Stud.io warns you by placing a small exclamation mark next to the part in the model inventory list on the right of the tool. Here’s what it looks like:
Notice on the right side the highlighted tile is marked as I’ve described. When I create the custom tiles, no matter what I tried I could not get rid of the mark, even though I know the 1×6 tile is available in metallic gold. So what gives?
To answer we need to take a quick look at how I create the new tile with the logo and tagline on it.
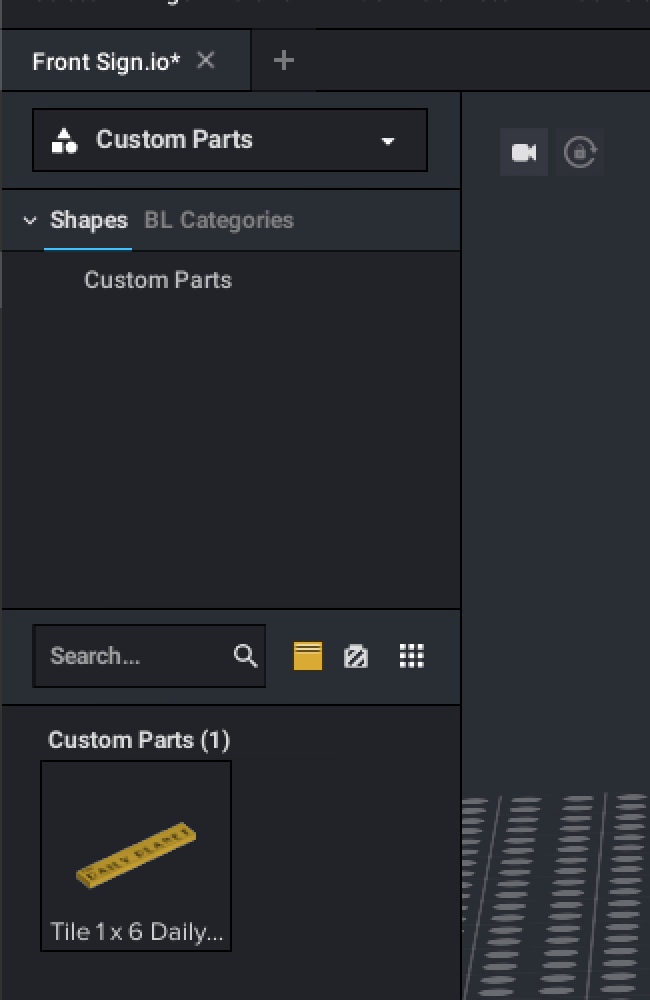
The first thing you have to do to create a custom tile is to make artwork in the right size. I won’t go into a whole tone of detail about this, but basically I create a graphic with the text for each tile on it in a graphical editing tool and rendered out the image as a PNG file with transparency. I made sure that it was going to have a final resolution of 150 DPI and then save it on my computer. Next you go into PartDesigner, select the part to use (in my case “6636 Tile 1 x 6”), then import the graphic you made and saved in your computer, and place it on the tile. Once you have it placed correctly, you just export the new custom piece to Stud.io. You can find the new part by clicking on the catalog selector on the left above where you select parts to use in your models. By default “Master” is selected, so just click it and select “Custom Parts” (see below). If you did everything right the new parts should be shown for use in your designs.
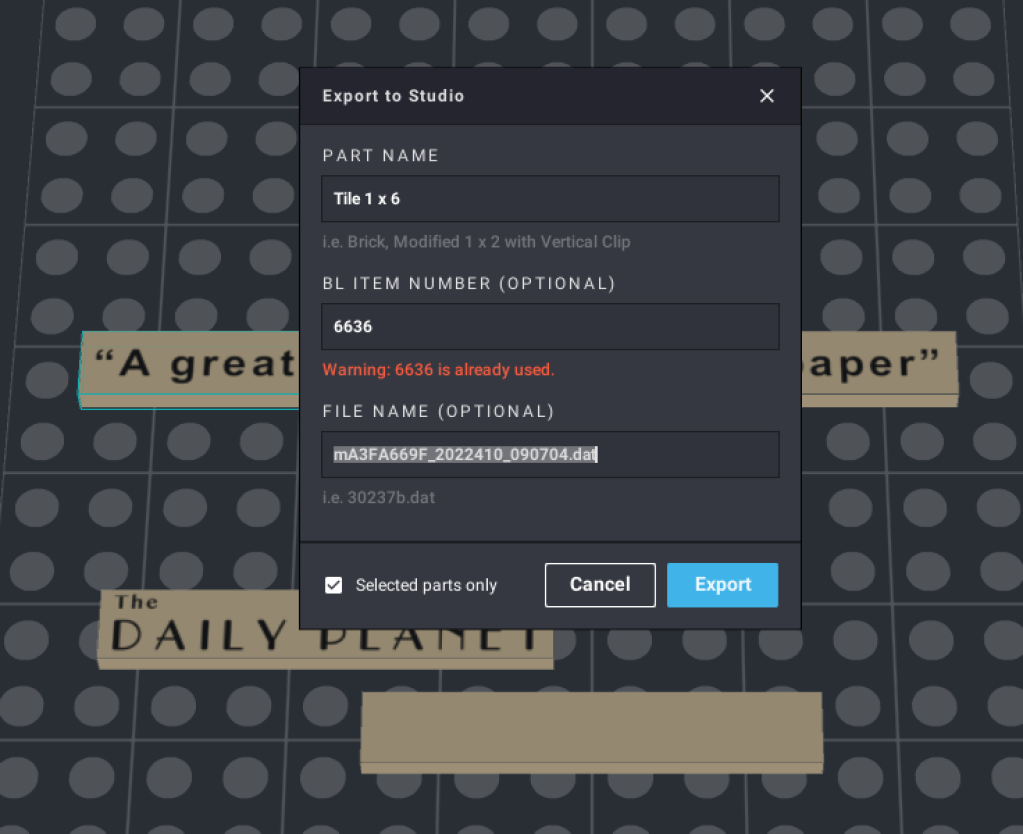
The odd part is that when you use the custom part in a model, the exclamation point will appear saying you’ve used an illegal color, and I tried to figure out why and how to fix it, to no avail. Next I used the great oracle, Google and was rewarded with a link that said all you have to do is add the part number to the custom part before exporting to Stud.io and it will show the available colors for the part your custom part is derived from. I tried as many permutations as I could before i stumbled onto the correct answer. When you start the export you’ll see the dialog below, and all you have to do is put the part number in the “BL Item Number (Optional)” field. If you tab away before saving you’ll see the warning that the part number is already used shown below. Just ignore it and export and Voila! Your part should show the available colors for the base part.
I hope this will help some poor soul like me avoid spending an hour or more trying to figure it out.
Also, since you’re around and have read this far, below are a few renderings of the final version of the sign. Oh, and about that tagline under the door – I’m sure many Superman fans will recognize the little easter egg as part of this introduction to the film that first made people believe a man could fly:
“In the decade of the 1930s, even the great city of Metropolis was not spared the ravages of the world-wide depression. In the times of fear and confusion, the job of informing the public was the responsibility of the Daily Planet, a great metropolitan newspaper, whose reputation for clarity and truth had become a symbol of hope for the city of Metropolis.” Superman: The Movie (1978)
Since I like looking at it so much I created two Daily Planet wallpaper images (below) if anyone besides me is remotely interested in staring at it. One is 2880×1800 and the other is 3440×1440. If anyone would like a different size shoot me an email or leave a comment below and I’ll add it.
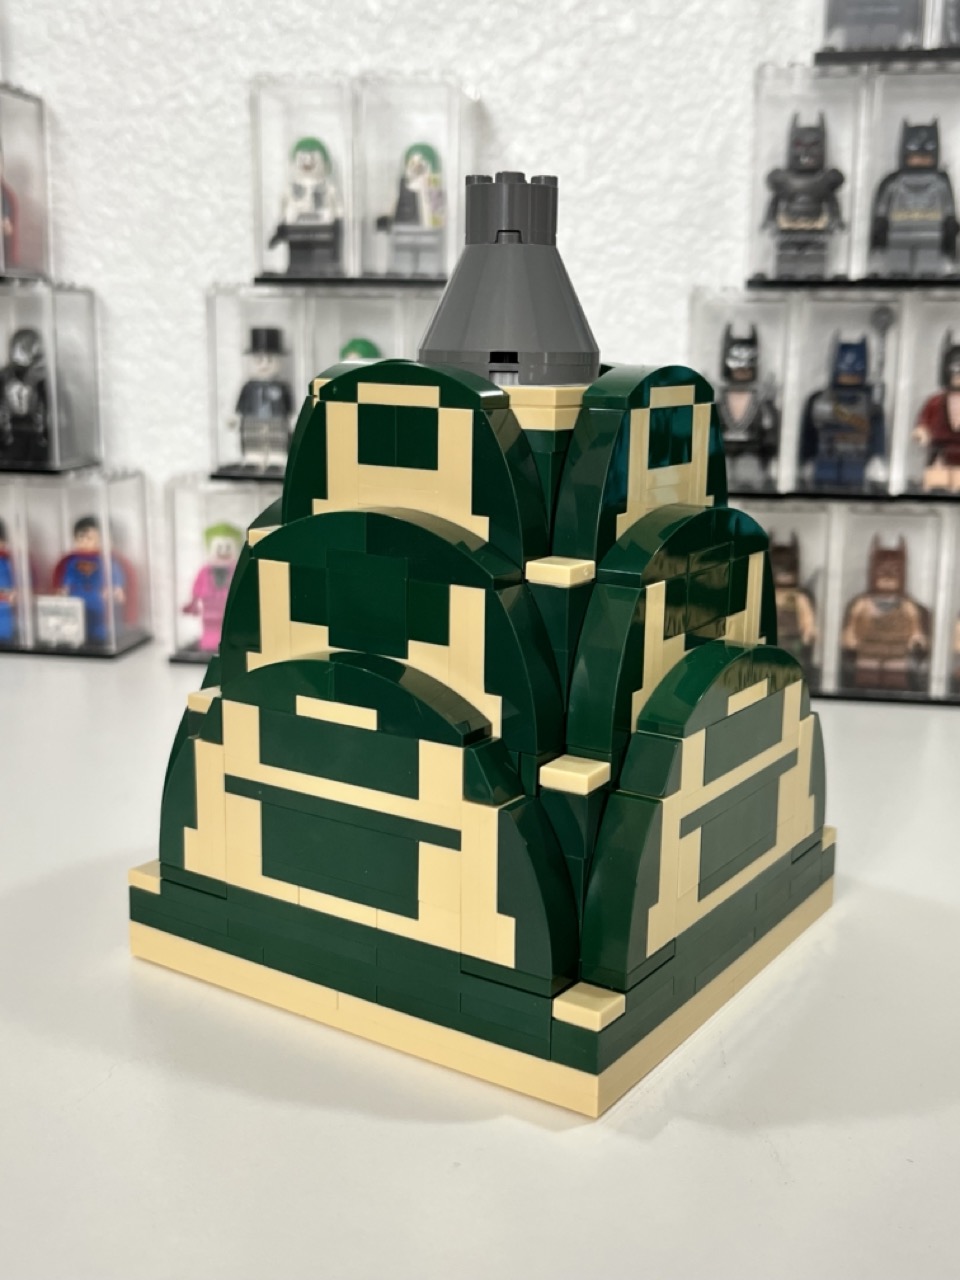
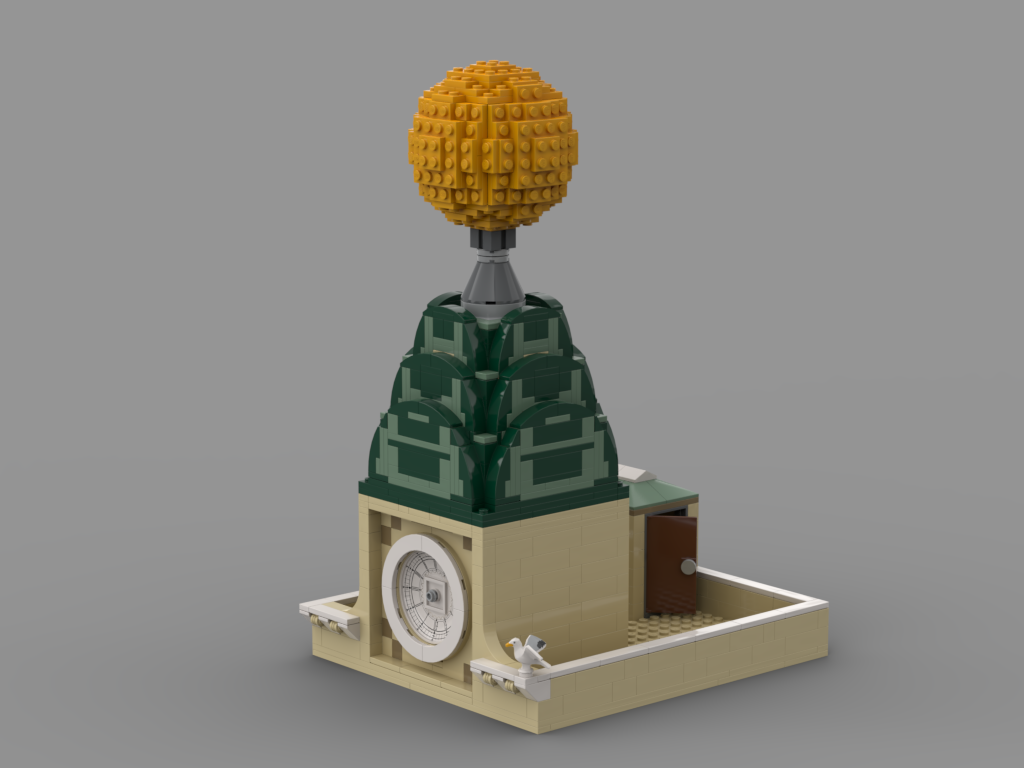
I ordered the bricks needed to build the dome of the Daily Planet model that I’ve been working on (and talking waaaaayyyy too much on here) and they arrived as you can see, and you can also see the result. It’s actually kind of strange to see it manifested in real bricks after looking at it for so long on the computer. Now I only have about 4,900 more real-life bricks until it’s done. Pray for me (any my bank account)!
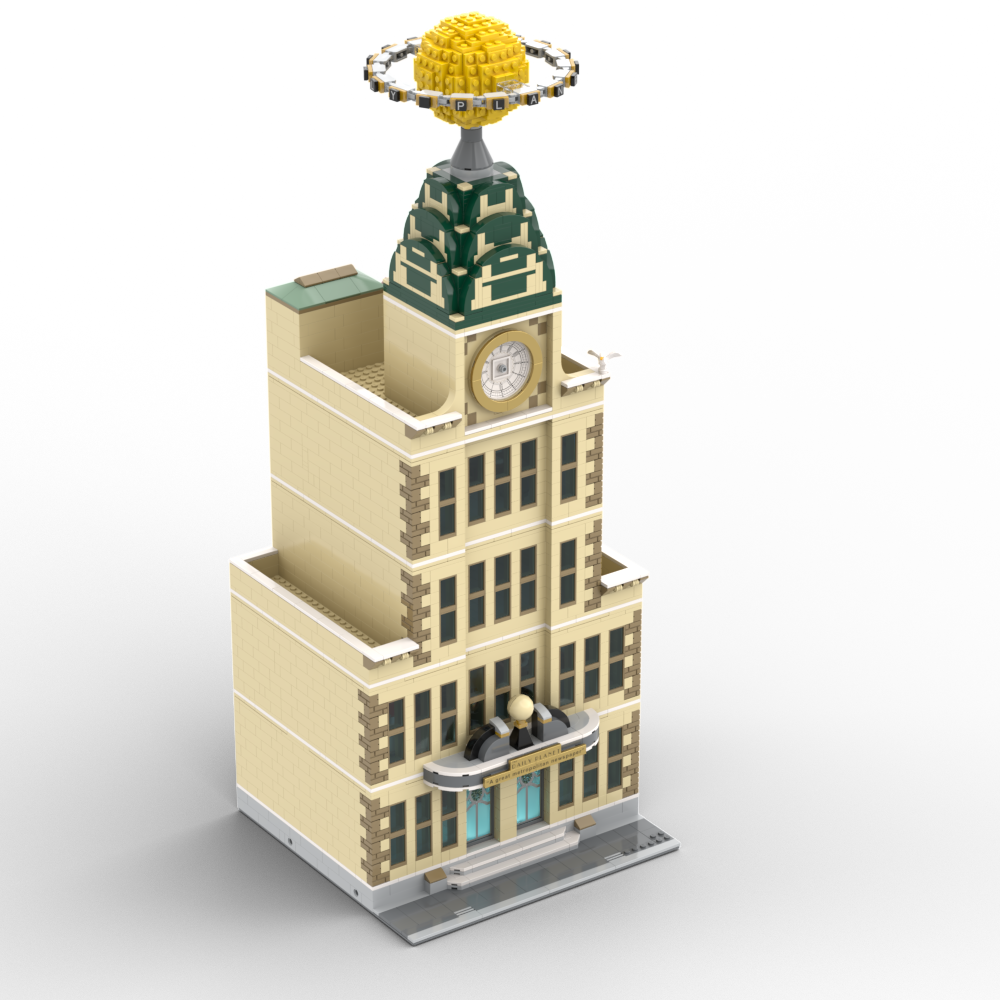
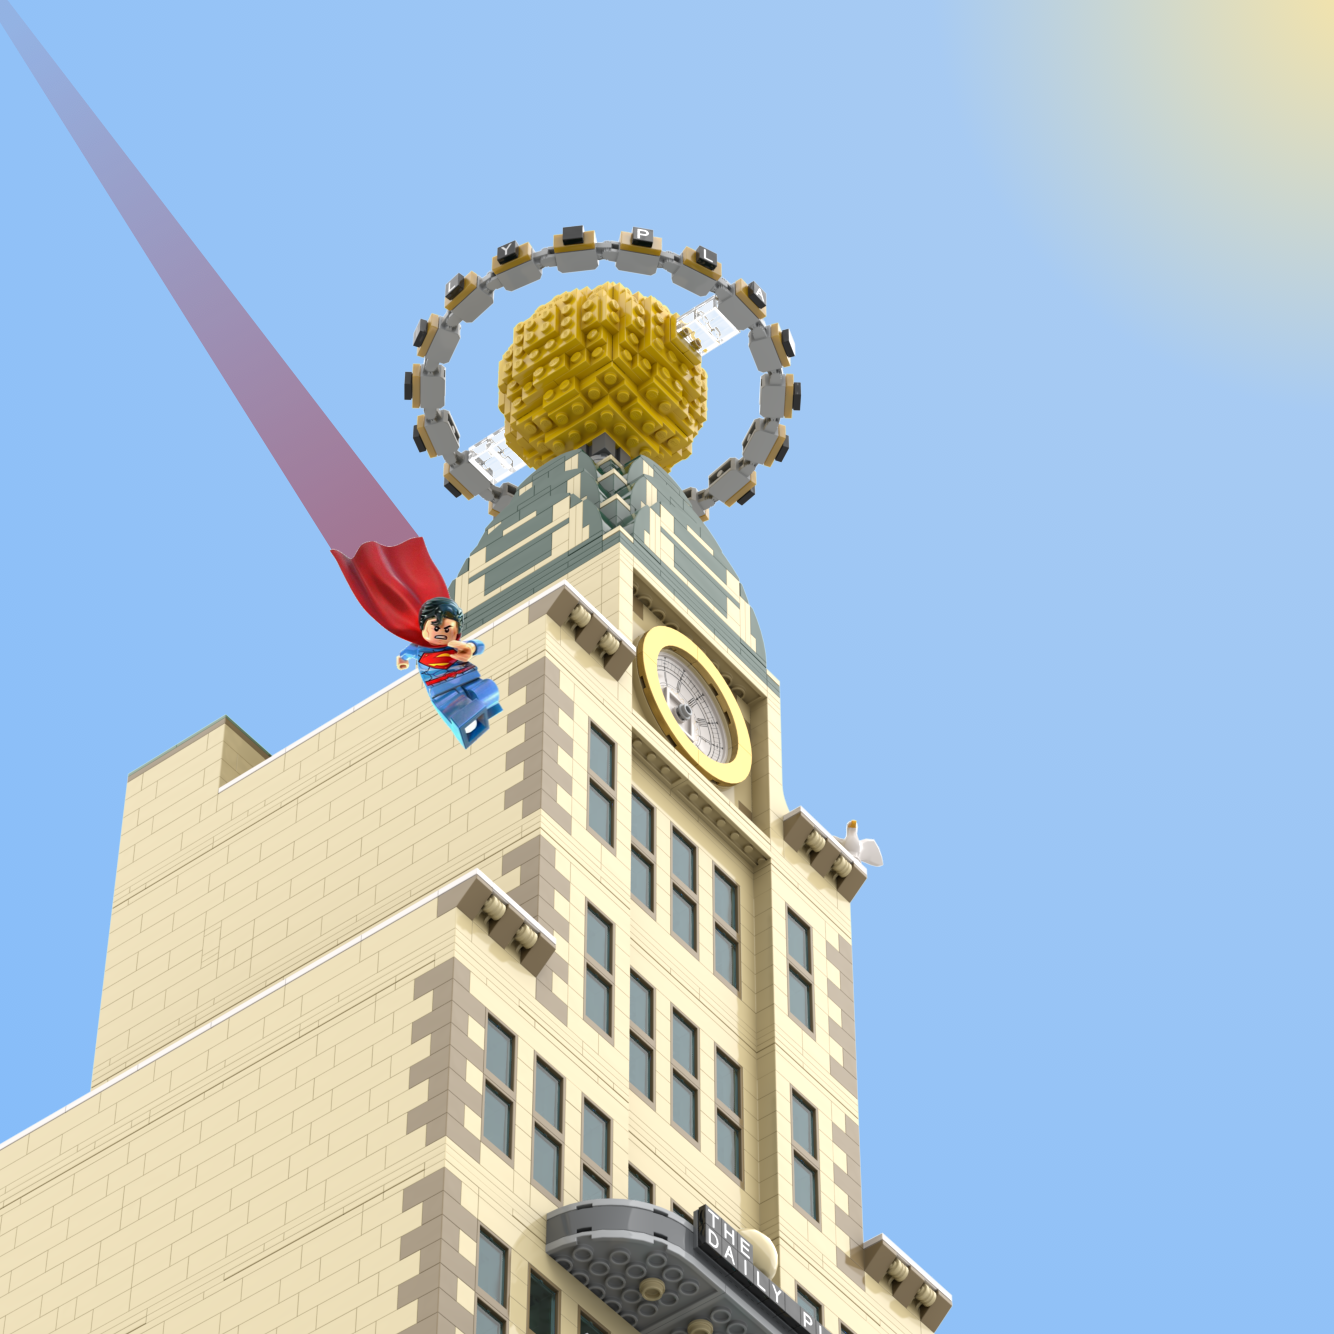
After playing around for several days, I finally worked out how to get the iconic lettering around the Planet globe at the top of the building! There’s a few more images below and if you’re interested in the stats for the whole thing here it is: As it stands there are 5,894 LEGO parts (not including Superman shown below), which means it’s gonna be too expensive for anyone except Jeff Bezos to actually build in the real world, and the total time I’ve tracked so far is about 325.0 hours!
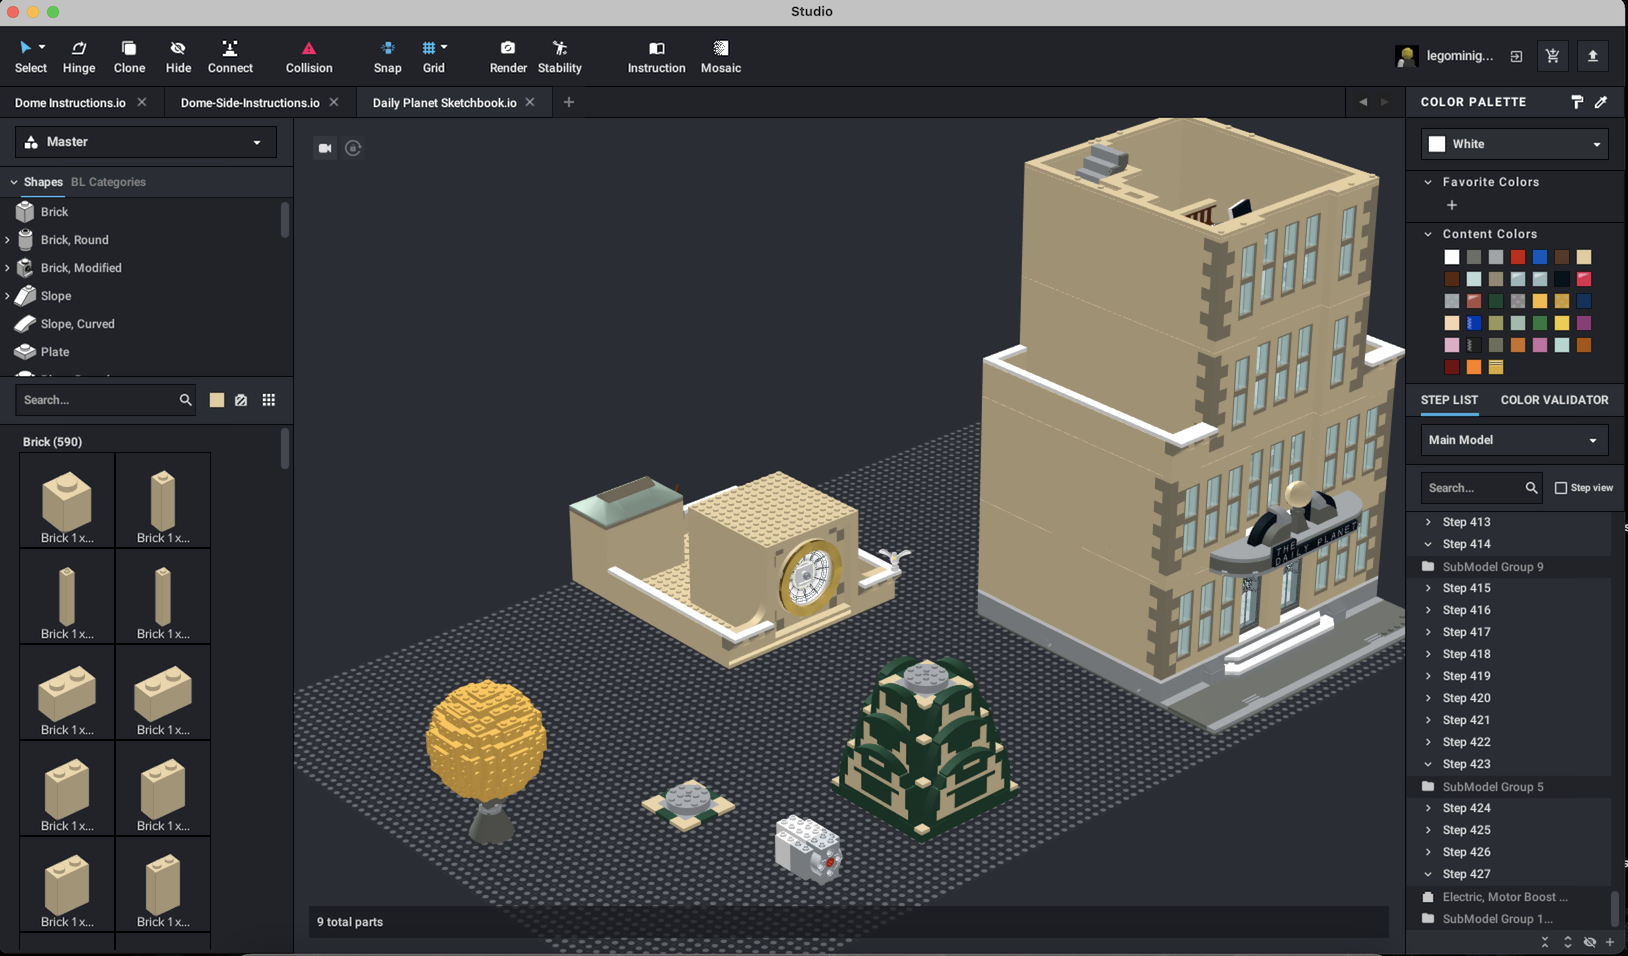
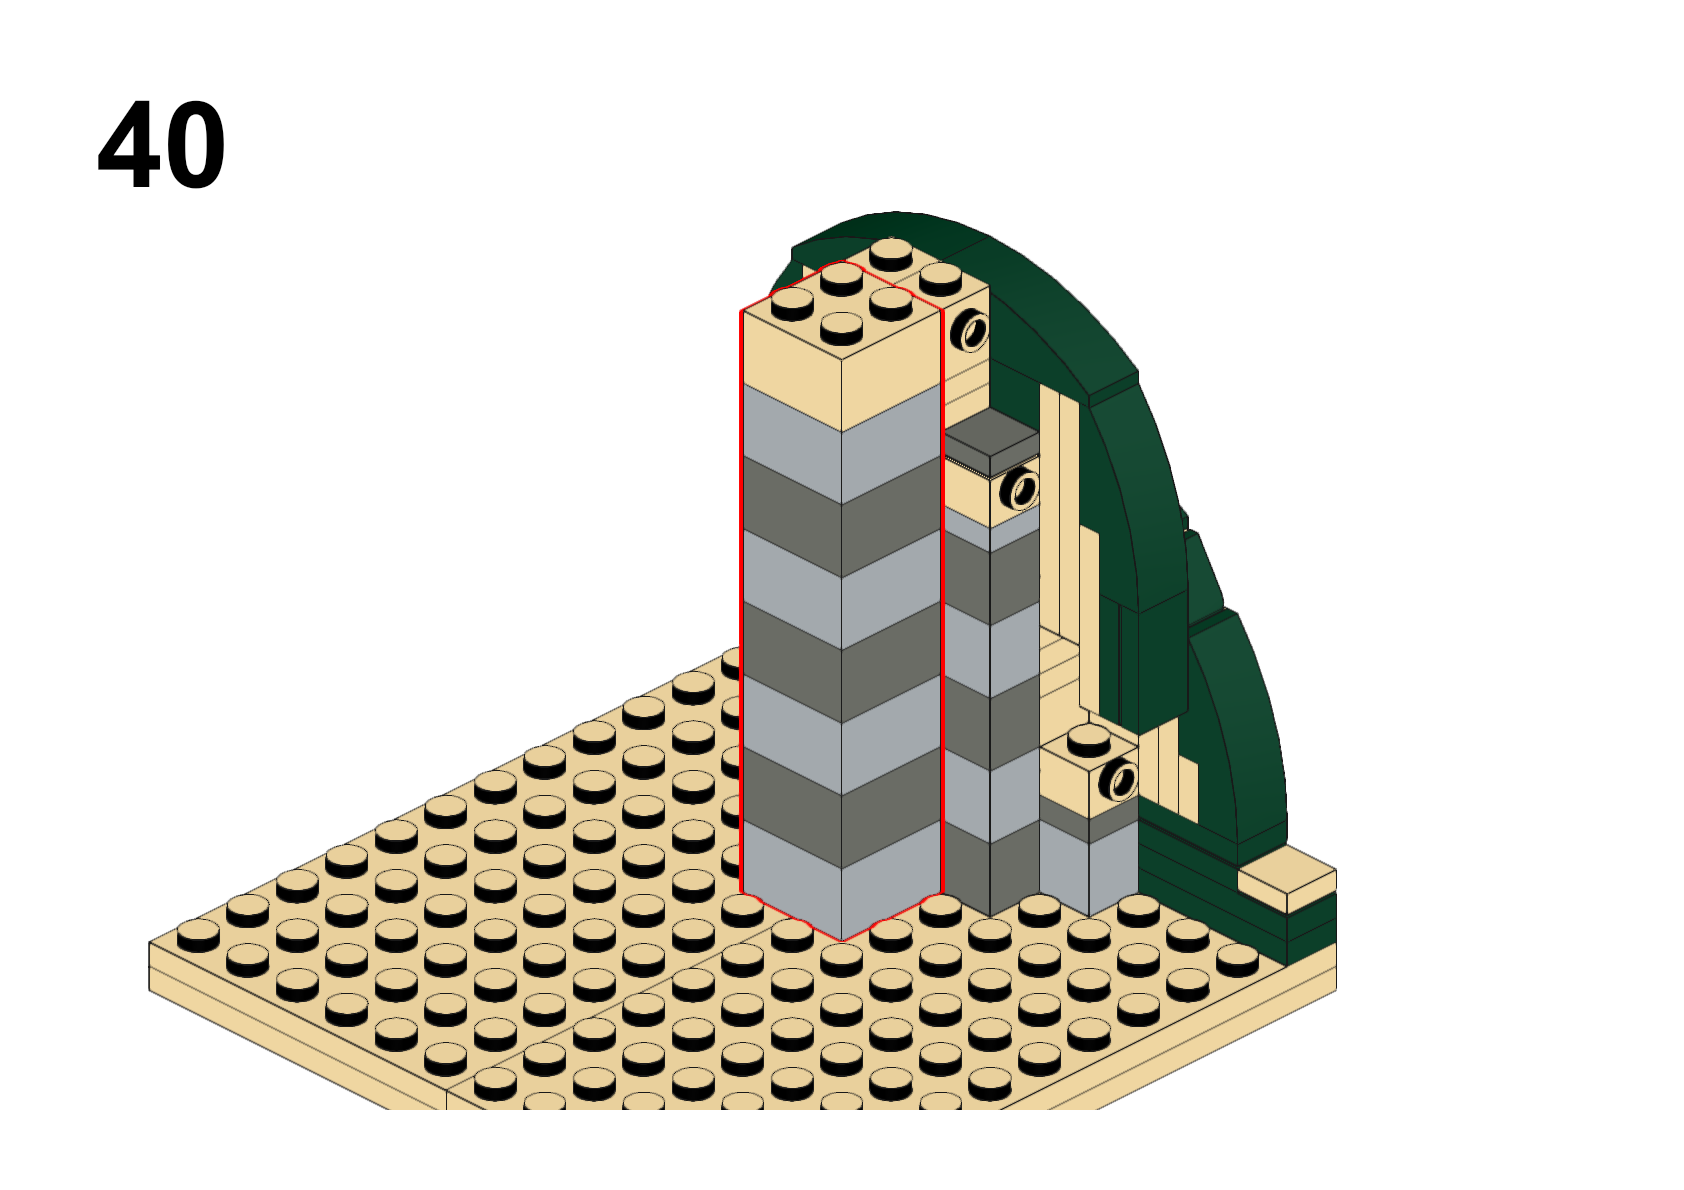
I started working on instruction generation for my Daily Planet model because even though I hoped to be able to squeeze the globe rotation motor into the green dome at the top I suspected it wouldn’t be possible while making the dome strong enough to support the globe. It looks like that’s probably true, but to be certain I’m going to build the dome and globe out of real bricks (and I’m trying to convince my wife it’s the only responsible thing to do).
There’s a screenshot below of the design tool I use, BrickLink Studio if you’re interested. It does have a steep learning curve (at least for complex projects), but it’s incredible to be able to design something like this on a computer.
I’ve been planning to start using MILS plates for my modulars for a while and it turns out there’s a few different schools of thought. In the end, I decided to go with color coded corners (for easy identification at shows and such) rather than solid colored 2x2x1 bricks, along with the usual technic brick connectors on each side of the corners. Another minor deviation from the usual MILS plate that I decided to adopt was adding small arches on each side to allow threading wires for motors and lights and so on. As you can see it’s Superman approved!
As I’ve been building the Daily Planet model I’ve struggled with my original tan with white accents and the more I look at it, it just seems too monochromatic, so I quickly did a render using tan with dark tan accents, along with white around the roof line and gold around the clock at the top. And now I’m wondering what folks think about it? If you have an opinion, I’d love to hear it.
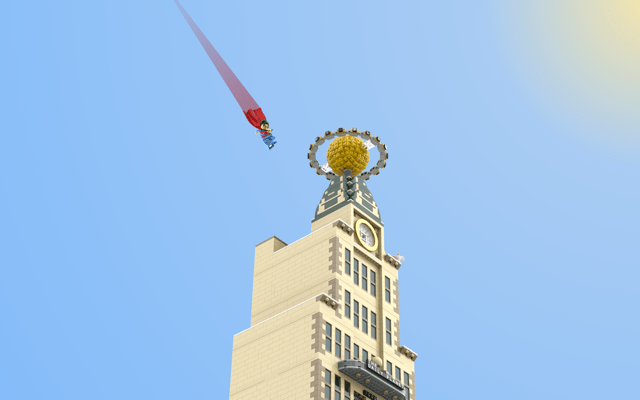
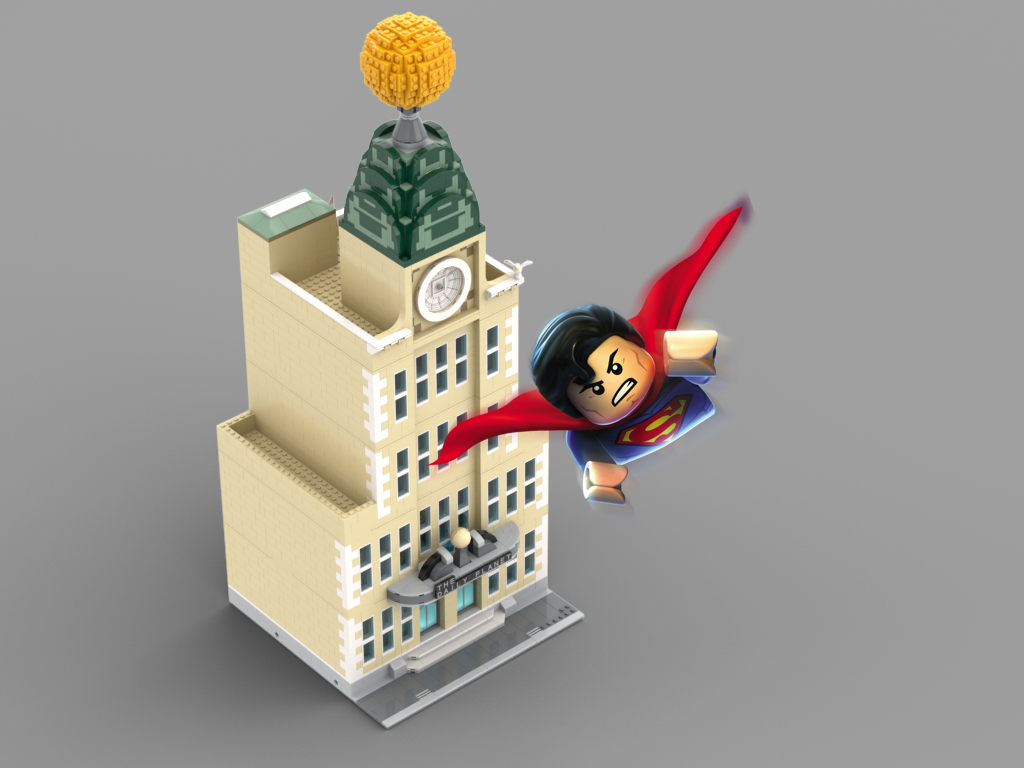
Here’s some new renders of my Daily Planet LEGO model. The globe on top is still a “sketch”, but I did re-work the clock at the top to it’s (mostly) final form and I put some of the detailing there as well. Overall, I’m absolutely thrilled especially since this is my first modular (or any other) design, in fact I was so happy with it that I couldn’t resist photoshopping LEGO Superman into a few of the images for fun. There’s a few more images below.
In case you’re wondering it currently weighs in at 5,511 pieces and I’ve spent about 270 hours (yes, that’s 6.75 full-time work weeks) since I started the design about 5 months ago.