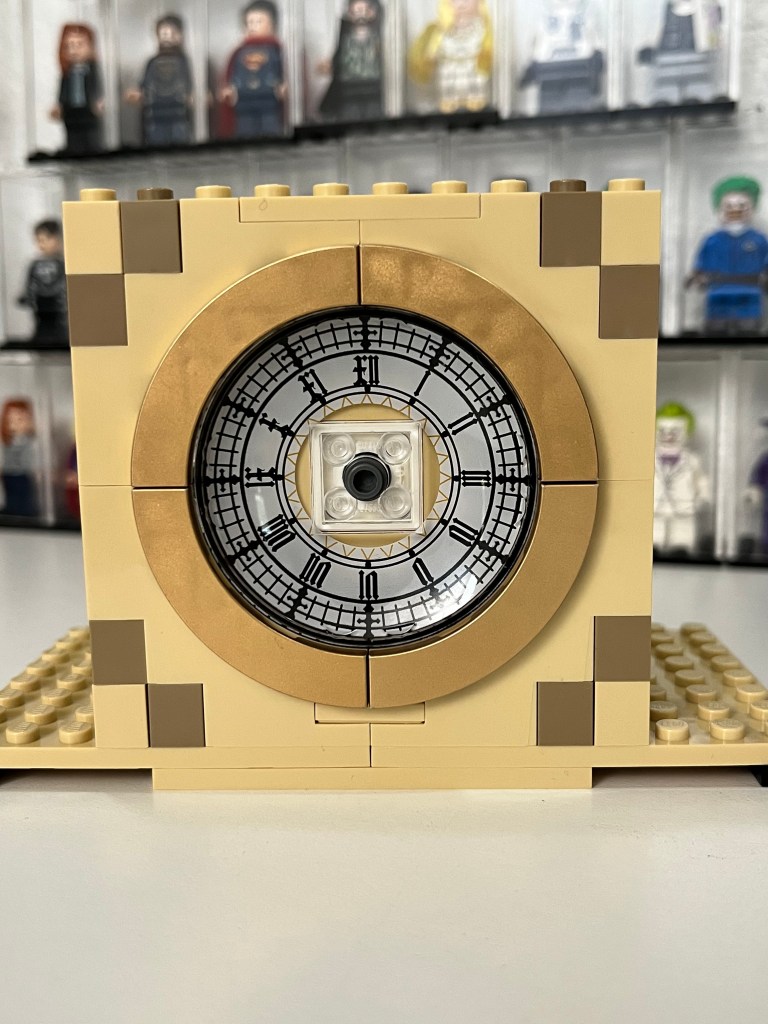
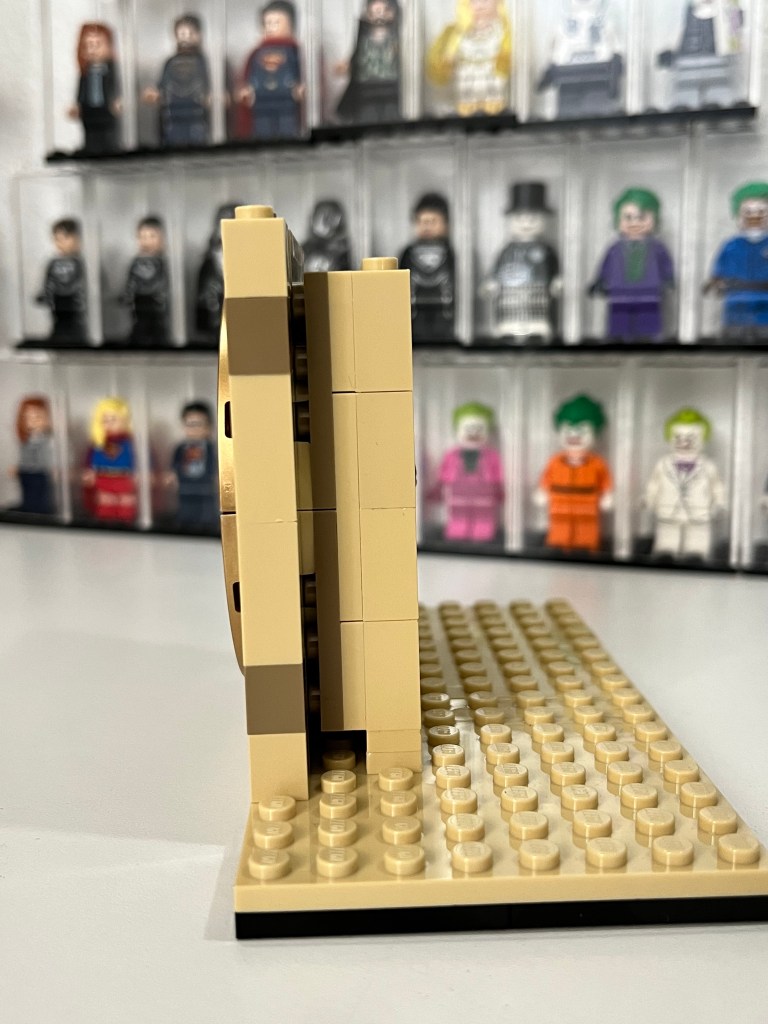
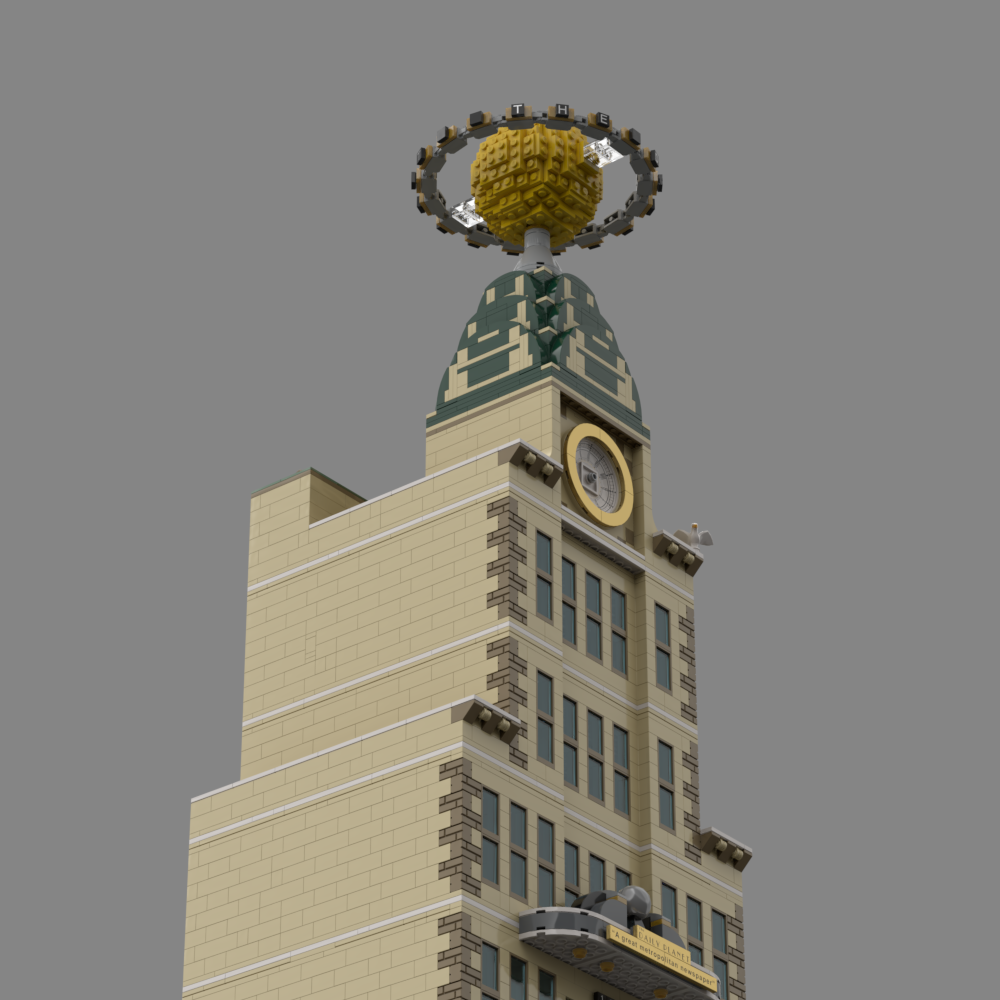
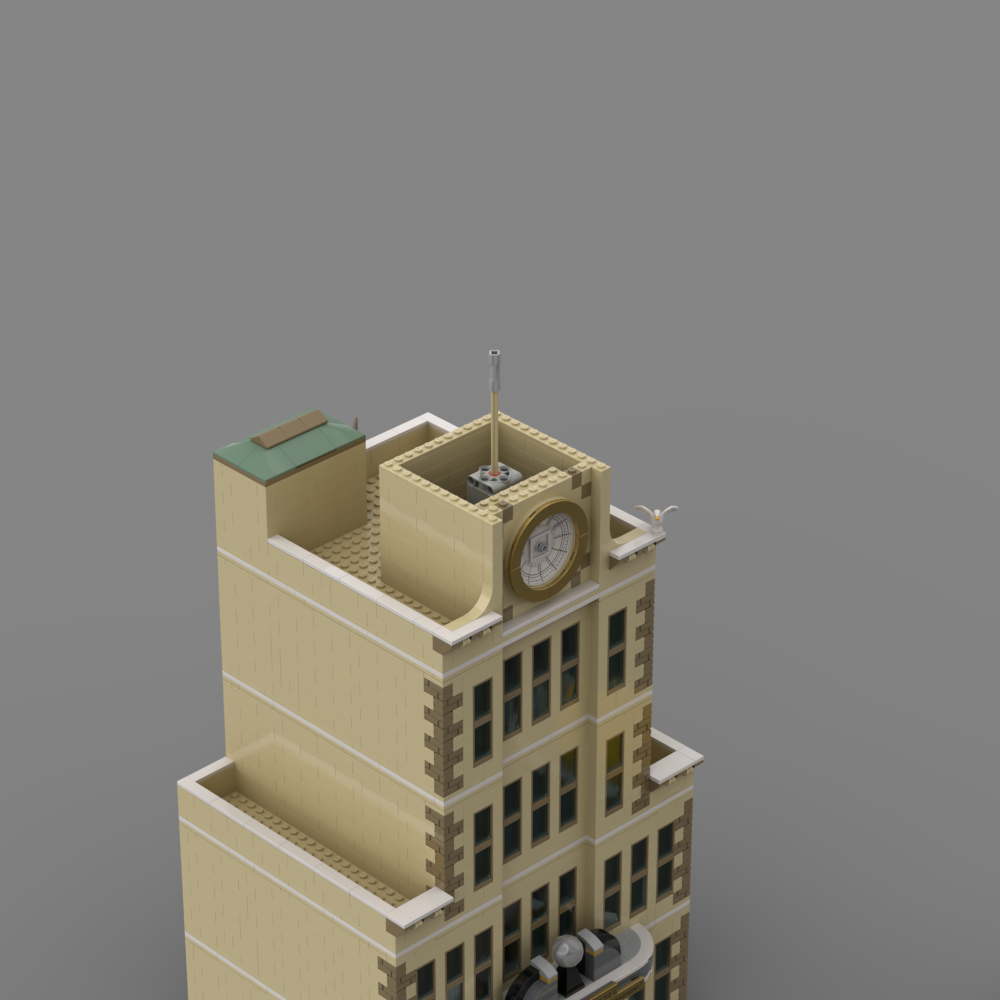
Now that I’ve cleaned up and reworked the clock for the top of the planet I also finished (mostly) reworking the fifth floor which now includes a door that opens behind the clock to allow access to the hub that controls the motor that rotates the globe on the top.
I’ve also added an air conditioning unit communications antenna array. I’m planning to create two large custom art billboards for each side of the clock tower, and a custom warning tile on the face of the bottom of the antenna. There’s more photos below.
It’s been a while since I posted a Planet update, and that’s been because I’ve been super busy (going to Bricks By The Bay) and getting set up to take on a collaborative build for that show in 2024 the theme of Once Upon a Time. For that build my part of the will be the Wizard of Oz, and I’ll be working with my resident expert, 8-year-old Henry.
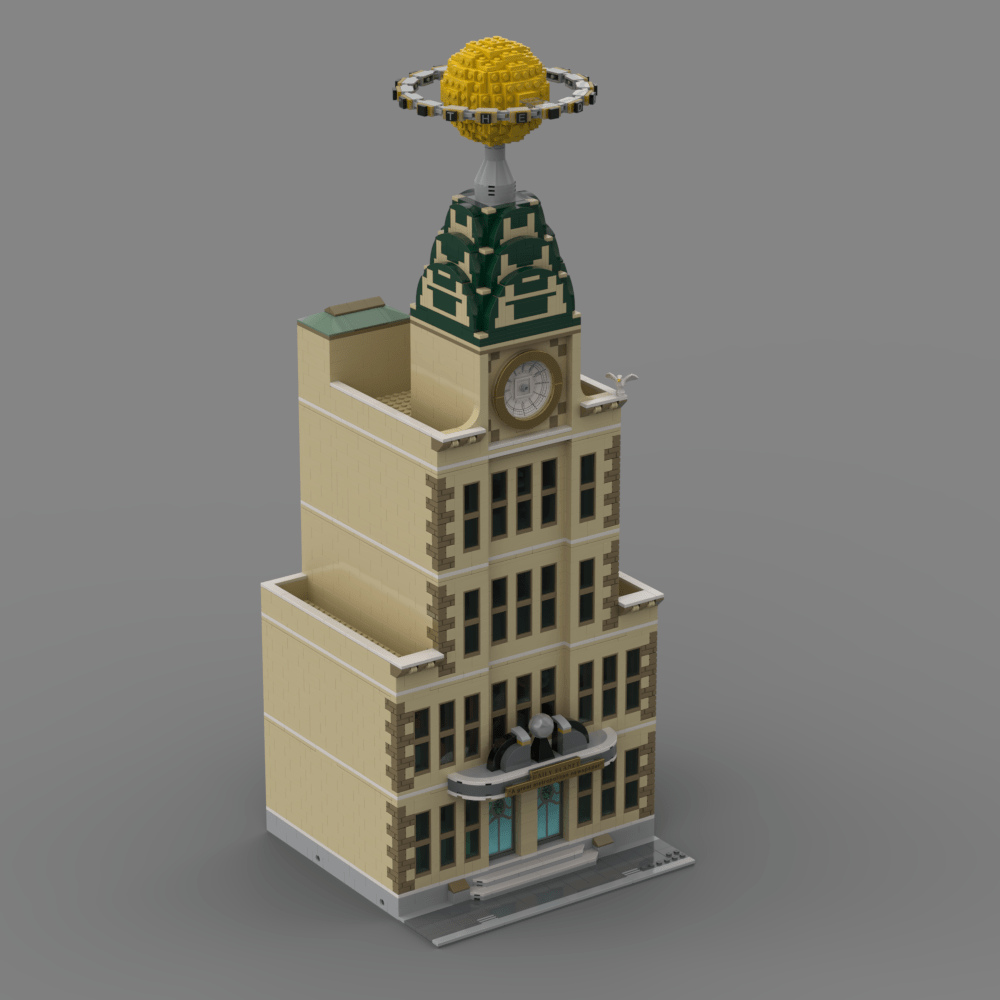
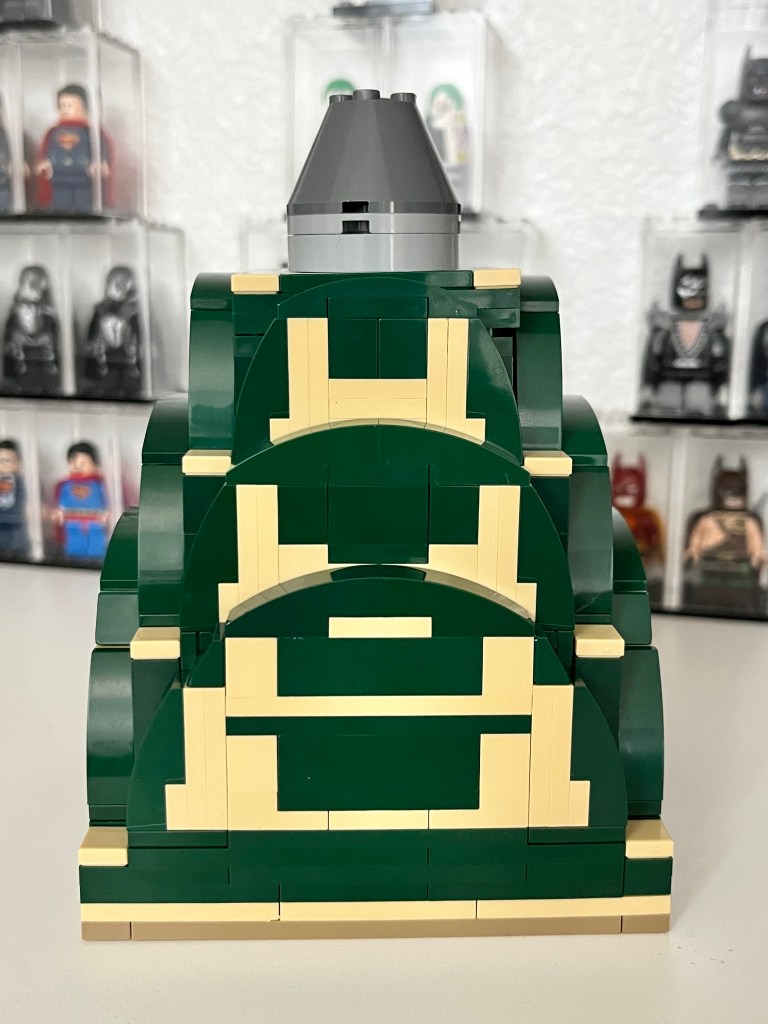
But enough about that – I’ve also been revising the instructions for building the 5th floor of my Daily Planet MOC which is the roof where Lois smokes which includes a clock. In order to accomodate the Powered Up! motor and hub I wanted to add a hinged back wall that can be used to access the hub for recharging the battery. Once I had the design done I went ahead and ordered the parts to build the clock in real bricks and here’s the results, including another look at the entire facade with the clock at the top:
Overall, I’m absolutely thrilled with how it’s coming out, and I’m planning to order the parts to build the rest of the 5th floor this week or next, before moving on to building the globe on the top and starting to build the lower floors.
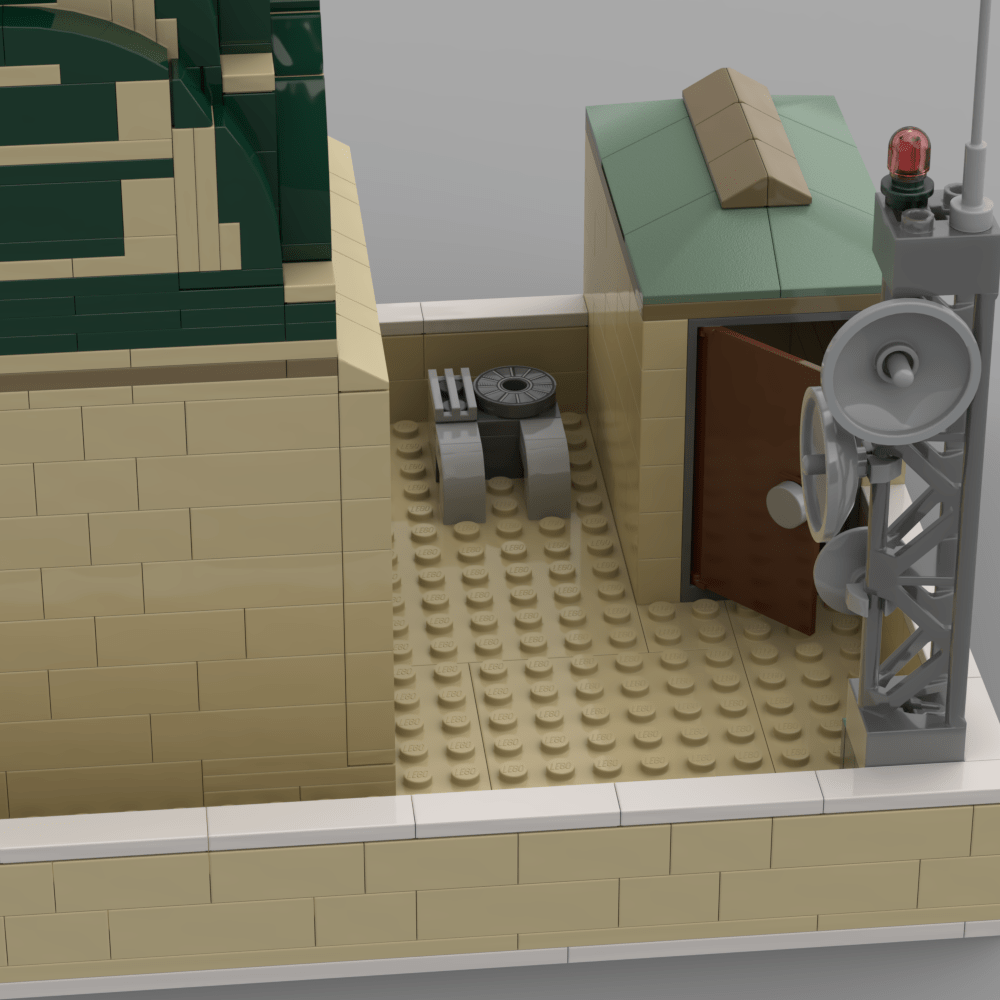
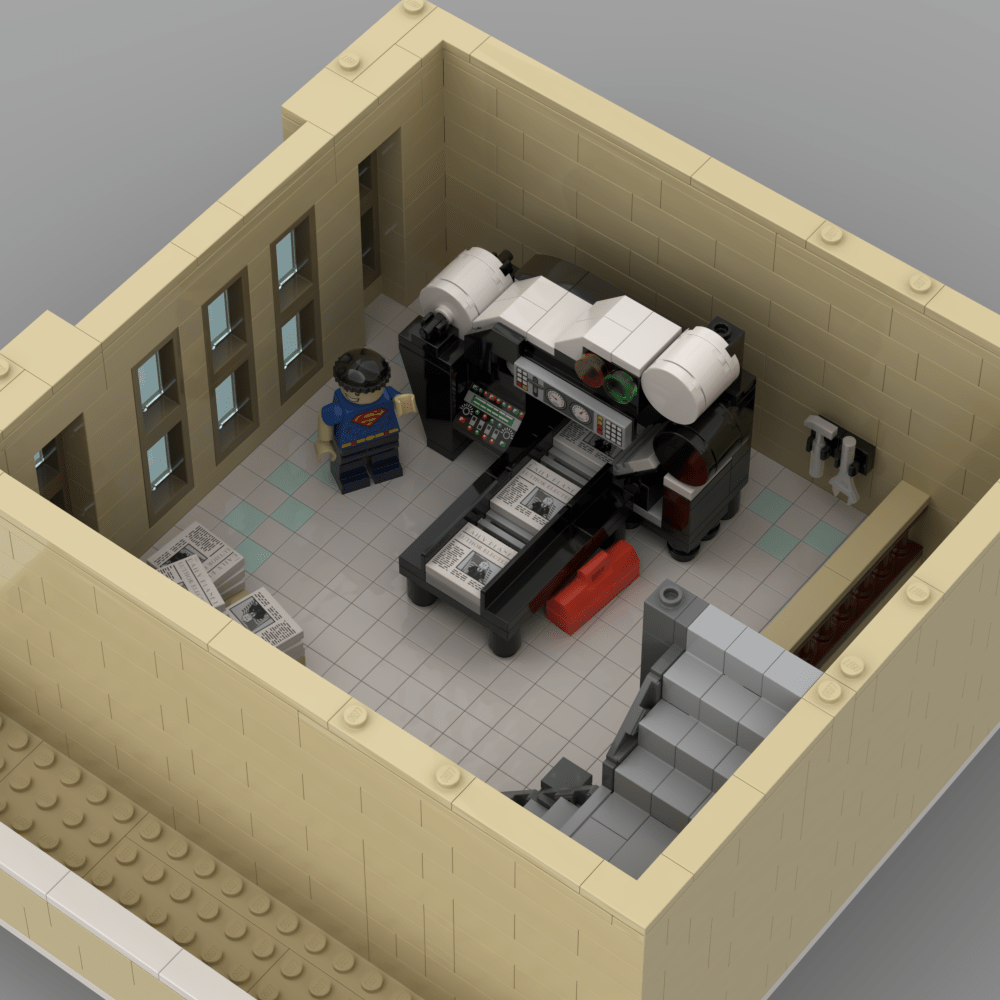
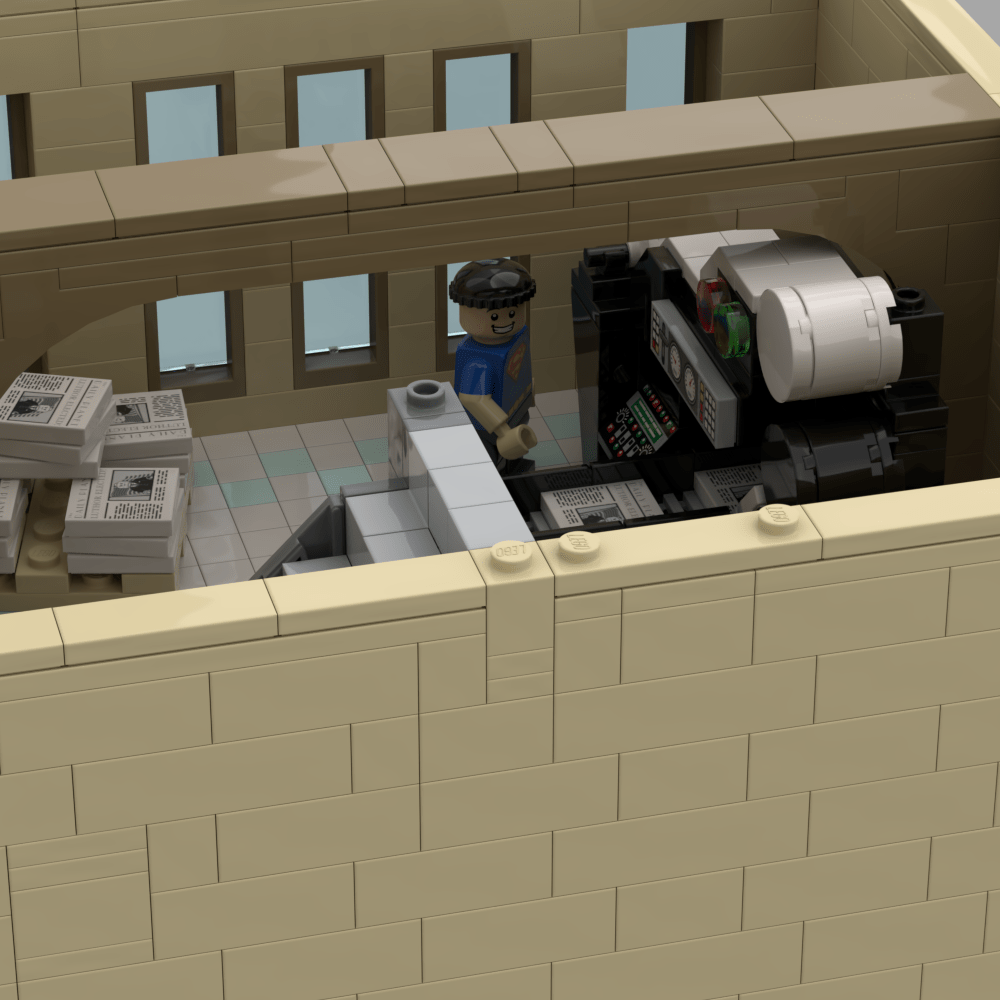
For the past week or so I’ve been working on adding a mailroom to the Daily Planet model. In real newspapers the mailroom is either adjacent or part of the room the papers are printed in. In the mailroom, mailers run machinery to insert ads and different sections into the folded papers and then they are put on pallets and sent out to the delivery trucks, etc. at various times, my father, grandfather, uncles and even my mom worked in mailrooms, and I even worked as a sub in a few for a while.
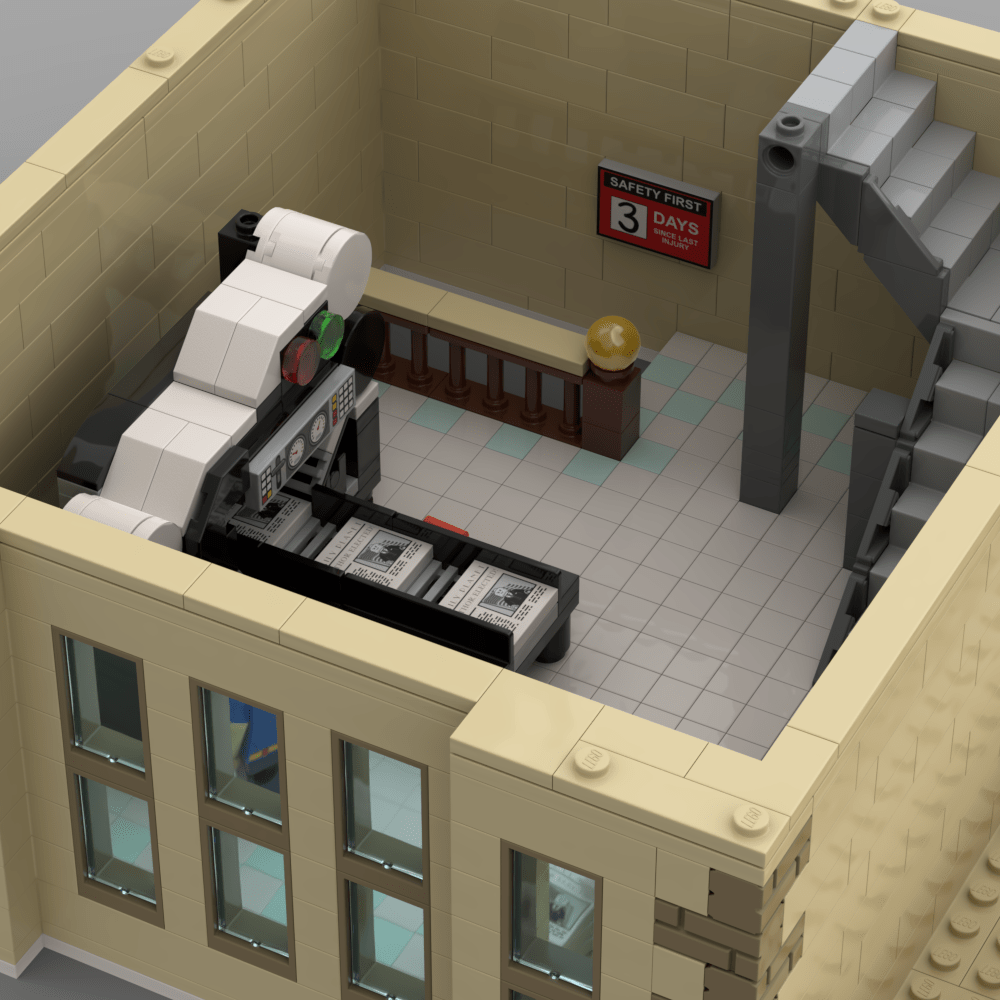
I decided to add a print room/mailroom to the Planet model for fun and you can see my rendition of a press to print the papers on, though the mailroom has been obviously simplified. I even created a minifigure of dad working there, along with some signage to go along with it (apparently the Planet is a dangerous place to work), and a pallet of papers ready to go and I chose the “Luthor Wins!” newspaper tile as the edition being printed. I’m thinking about adding more custom details and maybe even a locker, and a few more employees. You can see more photos below.
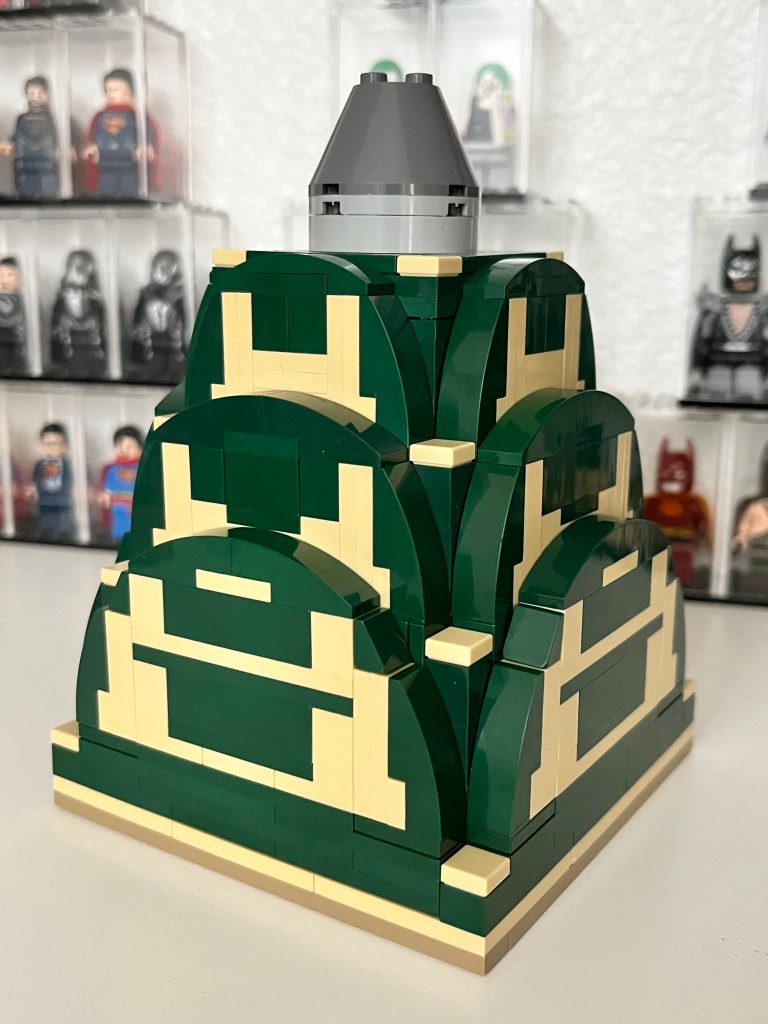
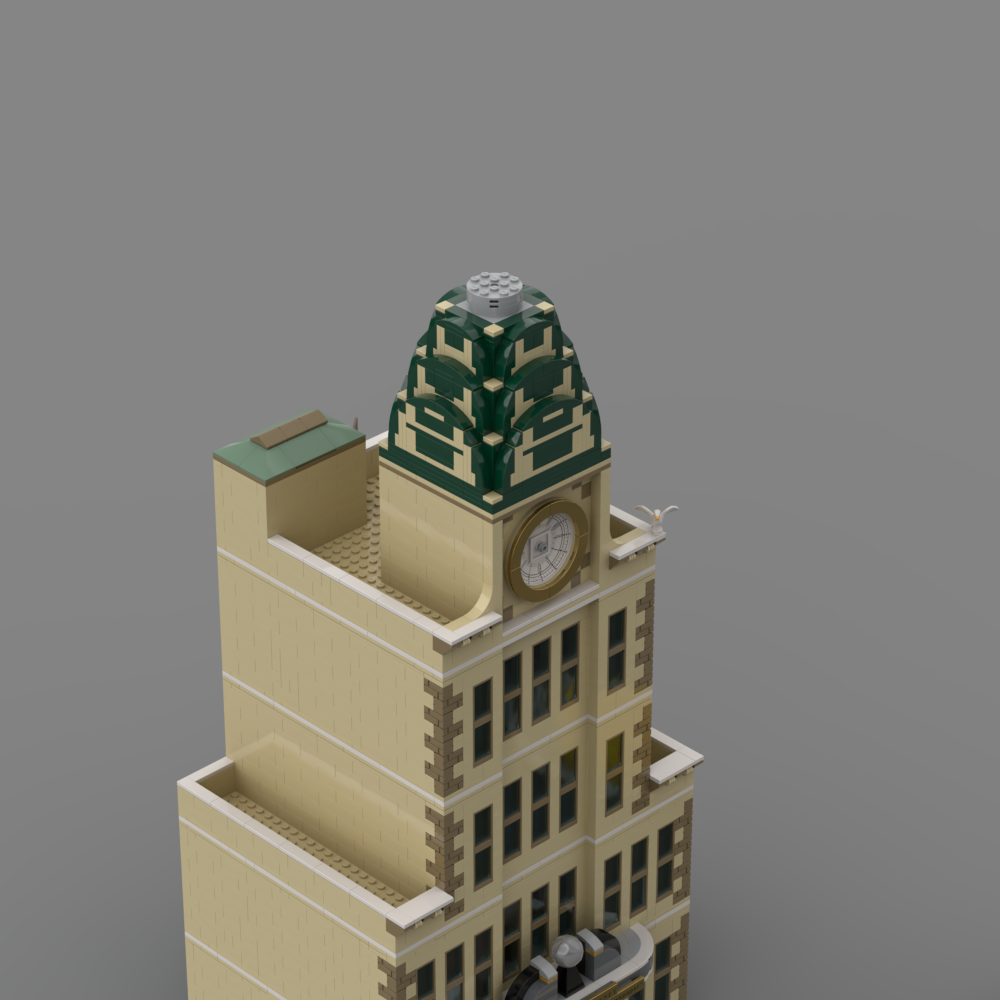
I’ve spent the last few sessions in Stud.io revising the instructions to build the dome, because I wasn’t completely happy with how easy they were to follow and there is a weirdness in the instruction generator around creating submodels for symmetrical objects like the dome sides. Truth be told I struggled with it for hours and wasn’t making much progress and then one Sunday morning a few weeks ago, my wife (a former software engineer as well) spent about 2 hours with me doing experiments creating submodels and then seeing exactly how the instructions are generated. The problem I was having was in creating the submodels in a separate file, then copying them into the dome file and having each side blow out into a completely different set of instructions.
In about an hour after spotting the common thread she suggested an approach that did exactly what I wanted and worked just like instructions for official LEGO sets. I plan to create a simple demo example along with the steps to create correct instructions and put them up here because I can’t imagine I’m the first person to struggle with it.
Besides that, I wanted to actually create a plan to allow the Planet globe to turn using a Powered Up! motor housed in the clocktower of the model and I hadn’t allowed for that in the previous build. This new set of instructions and the model in the photos here are the final approach and you can see a few aesthetic differences from the original build of the dome I did originally. Here’s a few more photos of the results:
I’ve also been working on the room where the papers were printed (interestingly called the mailroom) along with a model of the printing press to fit in the floor above the bullpen. My father had long worked in real newspaper mailrooms running the machinery used to add inserts for things like ads into the papers before they were sent out for delivery. I’ll be adding a LEGO minifigure of my dad to the model and something tells me he’d love it if he were able to see it.
I created a newsroom TV monitor for my Daily Planet MOC featuring the Flash! I designed it with Affinity Designer for iPad, and I continue to be impressed that I can do designs like this on a tablet. If you do vector graphical work and use an iPad, I can’t recommend it enough especially if you’re on the go and don’t want to lug around a notebook computer.
For the past few days I’ve been drawing another Daily Planet “newspaper” tile design for my model featuring The Flash!
I actually draw these using Affinity Designer for iPad in color and then desaturate it for the B/W 2×2 tile, but this one came out so cute I’m toying with having a Daily Planet special edition with a full color exclusive. Or maybe I’ll use this color one on one of the 2×4 “TV News Monitors” in the bullpen.
I originally started drawing these using Procreate, a raster tool, because I thought it would be fun to try to do them on the iPad in the evenings, and it never occurred to me to see if there was a vector tool available until I was working on the Brainiac tile. Imagine my surprise to find that Affinity Designer, my go to tool for print work, had a tablet version.
I admit I was skeptical about doing a complex project on a tablet, but after a bit of learning how to do things using only touch gestures, I was completely sold, and the Apple pencil makes it feel similar to working on paper.
I created another decorative tile for the Daily Planet MOC I’m working on. A Daily Planet exclusive: Brainiac Attacks! to go with my previous designs that can be found here. It’s been a while since I posted one of these and that’s because I did the previous tiles as raster graphics (pixel drawings), and since I prefer to work with vectors because they can be scaled to any size without pixelation. And because I’m doing them on my iPad and then bringing them into my final editing on the computer, I was delighted to learn that my favorite tool for print work, Affinity Designer was available for the iPad. There’s been a pretty steep learning curve for me, but I’m thrilled with how well the software works on it.
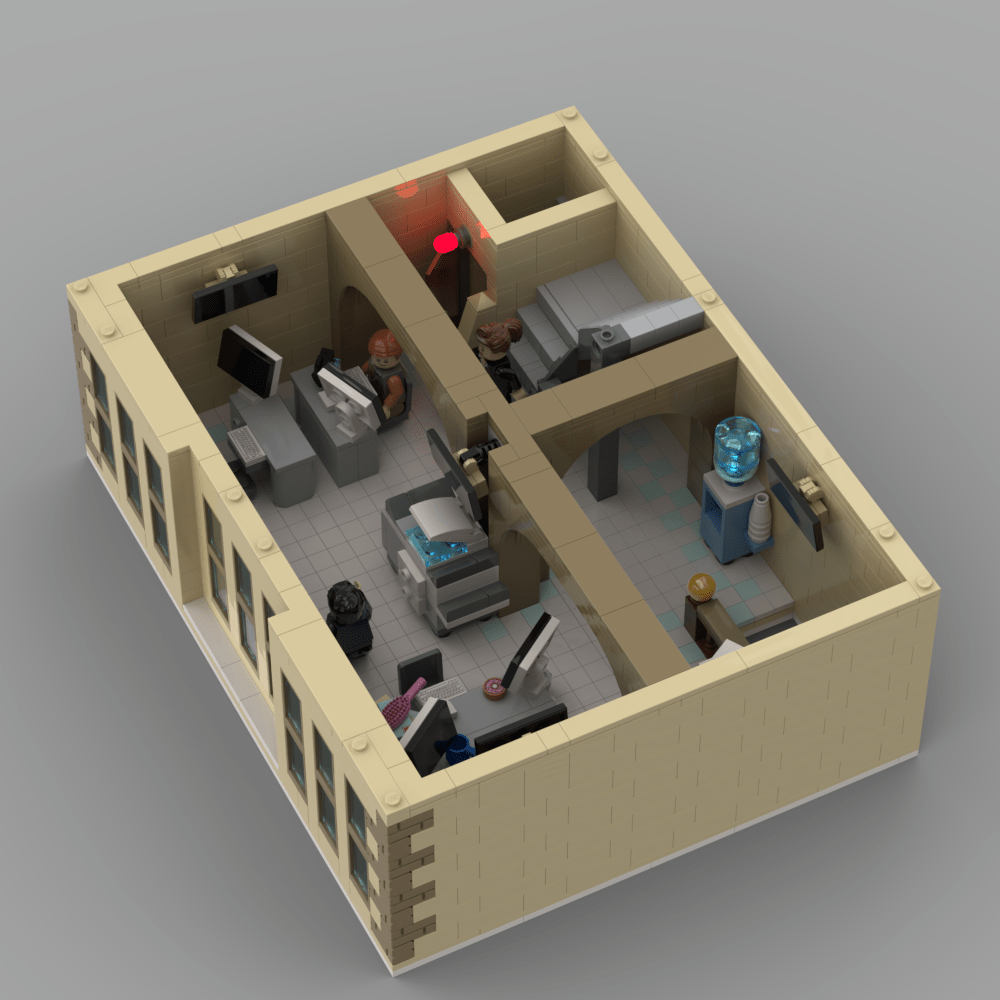
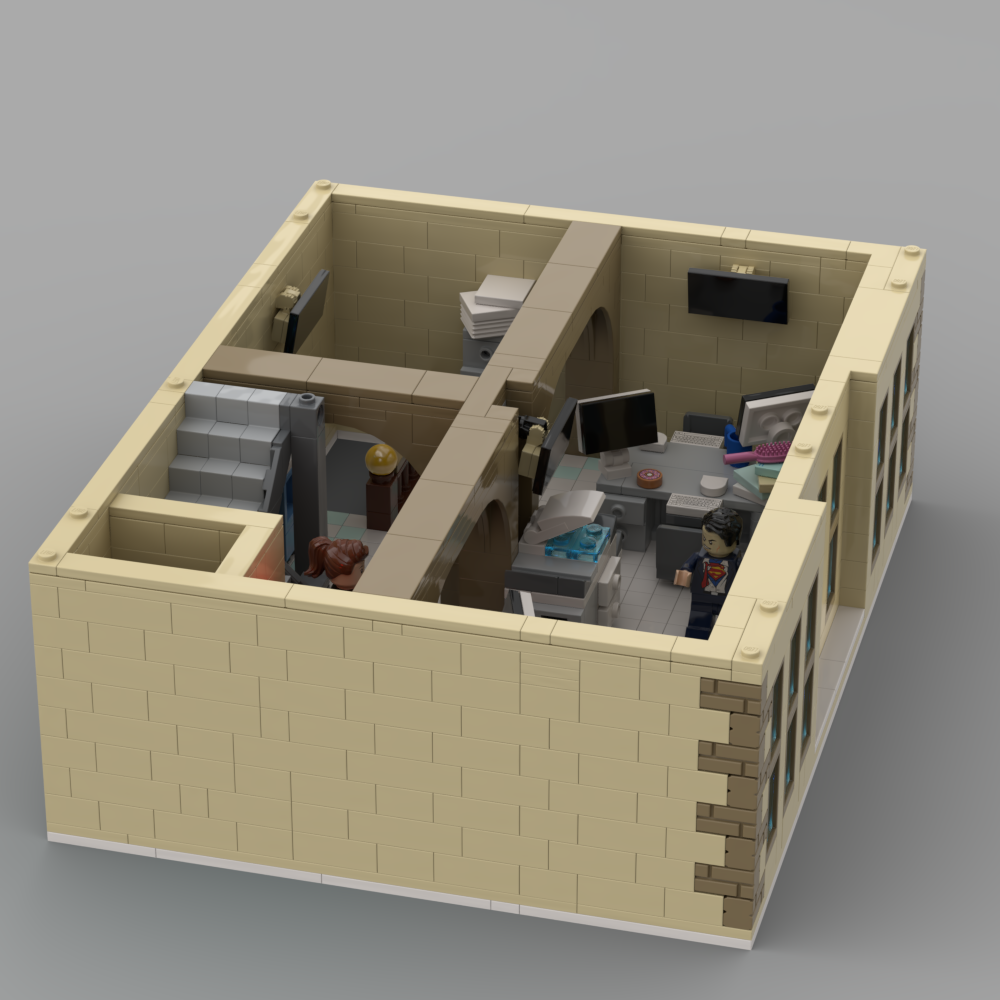
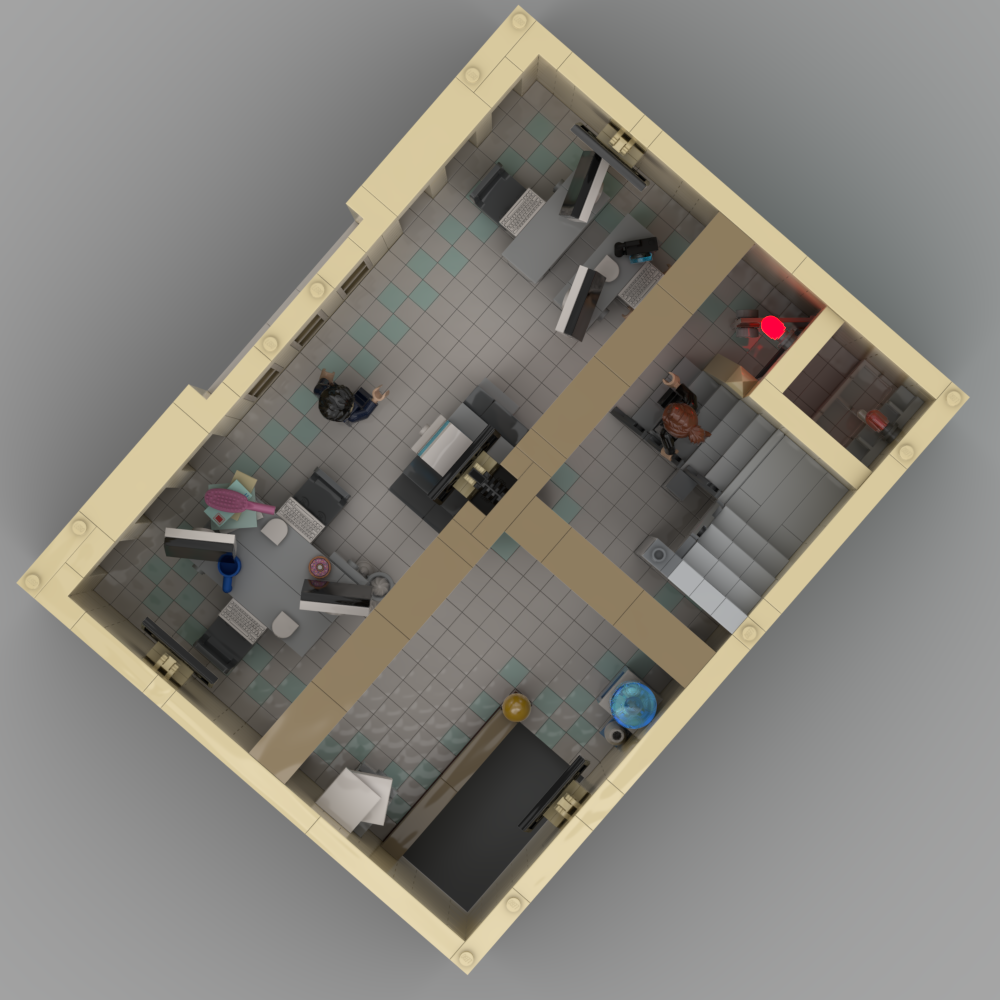
I just finished the interior detail work on the second floor of the Daily Planet. I modeled it somewhat on the Planet from Smallville and leaned into the art deco facade inside. For a long time it just seemed like a big empty box made of LEGO no matter how I oriented desks and other furnishings, but I knew I wanted to have big news “monitors” that would be printed 2×4 tiles with printed graphics for “televised news feeds” from Metropolis, Gotham, Star City, and Central City. Then I had an idea to put a column in the middle of the room, which of course was unstable with the 3rd floor removed, so I played around with adding archways to support it, and it ended up not only being evocative of the Smallville version, but broke the interior up making it feel more like an official LEGO set.
The floor includes a shared desk for Lois and Clark, a desk for Jimmy, and a desk for Cat Grant, as well as a filing cabinet, water cooler and copy machine.
I decided to rework the wooden brown desks to be a more modern grey too, which I also thought looked pretty good. There’s a few more photos below because it’s a bit hard to see around the arches and columns, and I’d love to hear any feedback in the comments about the new interior.
I created a few more decorative tiles to use on the inside of the Planet, this time of the results of Lex Luthor’s election as mayor of Metropolis and the special DOOMSDAY! edition cover. There’s a gallery of the designs down below you can flip through,
Besides a newspaper gallery, I’m planning on having TV screen monitors in the newsroom bullpen with channels showing news from Metropolis, Gotham City, Central City, and Star City.
Hey, this update looks just like all your other updates! But it’s not, because there’s something under the hood that I want to show you.
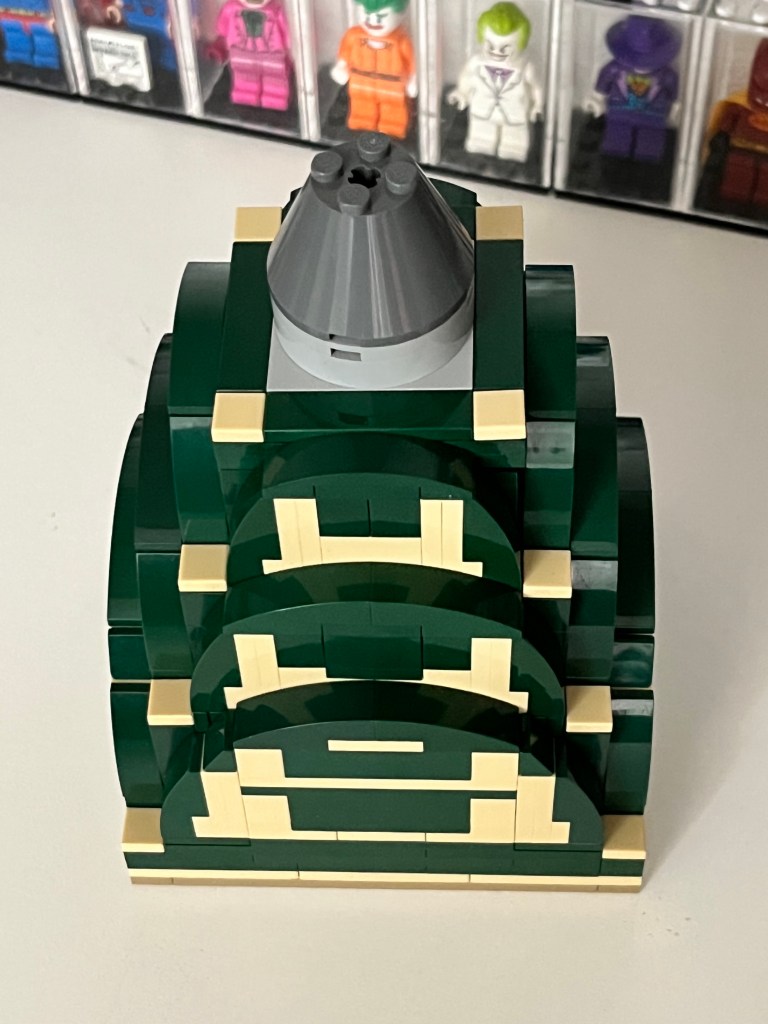
I had always planned to make the globe at the top turn, but as I was designing the model, I didn’t really work the requirements to make it happen into upper floor, dome, and globe. This weekend, I circled back to finalize the dome instructions, and took the opportunity to make sure the model is ready to motorize.
Honestly, I figured it was going to be a nightmare (Knightmare?) but I managed to get it right in a few hours, meaning I accidentally did something right. To turn the dome, I’m using a small linear Powered Up motor, and about the only thing I didn’t count on was that the axle needed to be between studs, rather than on an even stud. At first I was perplexed about how to go about it, but then after tinkering with some real life bricks, and the prototype dome I built I figured out how to center it properly. I was also worried that the clock face on the upper story would be troublesome because it extends back into the model quite far to make it all look right from the outside.
Happily it turned out that the internal structure for the clock ends exactly where the motor needs to be mounted, so the only remaining thing is the hub to control it. I ordered a small Technic hub this week and in order to fit it inside with the motor it appears I’ll have to push back the rear wall of the clocktower by one stud. If I can make it work, I want to add a door to the back that you’ll be able to open to expose the USB charging port on the hub, which will be pretty cool. Below you can see successive parts of the top of the model being removed to finally expose the motor that controls the rotation.
To say I was happy with how everything worked out would be a huge understatement, I was practically vibrating with enthusiasm, and once I get the hub and figure out how much room I’ll need, I’ll actually build the upper floor and clock tower to test it all together.