
The Globe, aka The Cherry On Top

No single element of the model gave me as much anxiety as the globe on top of the building. It’s iconic, and whatever I created had to evoke that image strongly if it was going to work at all.
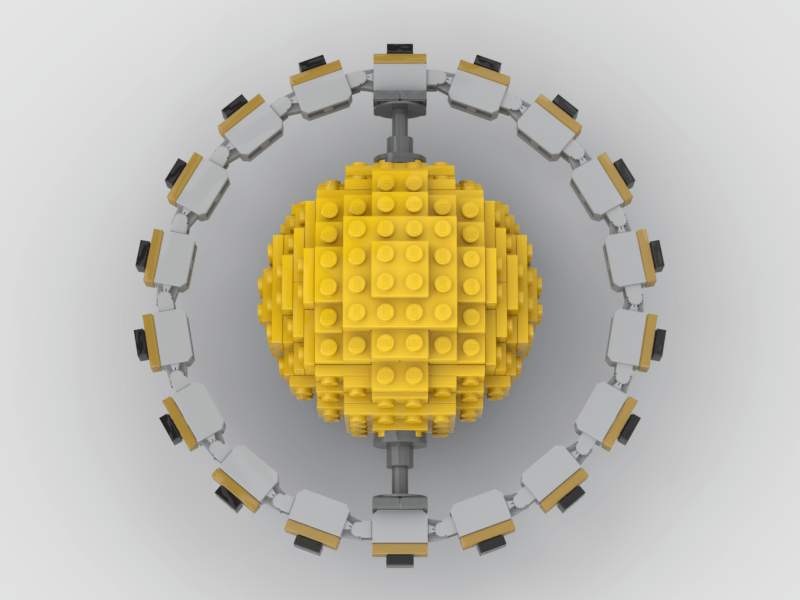
Fortunately, a bit of Googling “How to build a LEGO sphere” yielded a ton of useful ideas including a little shape called a Lowell Sphere. With many sizes to choose from, each with varying degrees of “roundness” I eventually landed on using the one featured in this article on Instructables for my sphere. I wanted to build it in gold, but the only color that existed for all the parts required for the sphere was LEGO yellow.
Once I had the globe itself I was faced with the problem of how to get the lettering around it. I tried lots of ideas, but in the end there was only one really viable option that created a circle with the correct diameter that could have lego letters attached to it: 1 x 2 hinge bricks with 1 finger vertical end and 2 fingers vertical end with 9 teeth. What a mouthful.
To each of these I added a gold 1 x 2 modified plate jumper that I could use to add a single letter.
The lettering I wanted was of course: “T H E sp D A I L Y sp P L A N E T sp” where sp was a blank tile creating a space for a total of 17 tiles including spaces.
Unfortunately, to make the diameter of the ring come out right to be spaced off of the sphere, I needed 18 hinge bricks. I tried several ideas over the following days to no avail and in the end I decided it looked best if I simply added an extra hinge brick with a blank space tile between Planet and The. This meant on the finished globe the lettering string was, “”T H E sp D A I L Y sp P L A N E T sp sp” which I thought would drive me crazy once it was actually built. In reality however, I never even really noticed it and I don’t think many other folks have either.
Oh, and remember those transparent bricks in the rendering on the previous page? As I was starting to build the globe in real bricks I came across another element I was unaware of (like I said, LEGO newbie). The part is called Support 2 x 2 x 2 Stand with Complete Hole. You can see it below.
With this part of the model designed, all of the major components were in place to do the actual builds. Since I had built the dome in physical bricks first, I ended up building the modular from the top down with the first floor being built last, but more about that and last thoughts about the model in the next, and final part of this article.
